Did you start journaling or planning to get productive and creative, and now have so many supplies that it’s preventing you from enjoying the process? Let us guide you through our Stencil Organisation System!
Now we have piles of different stencils, organised into numerical order by Stencil Identification Code. We will now group our stencils into batches and create an index!
In order to locate your stencils quickly, you will need a list of the names and numbers to refer to. We call this an index. How you create your index will depend on a number of factors:
Will you leave space for future stencil purchases? If you currently only have a few stencils, you may want want to leave space in your index for future stencils. i.e. You have Classic Stencils with codes C001 and C003, but intend to purchase C002.
How many stencils do you have in your pile? If it’s more than 20 you might want to go for a pre-filled checklist rather than handwriting the stencil names/codes.
Do you have access to a printer? If not, you might either hand-write your own index or purchase a pre-printed design.
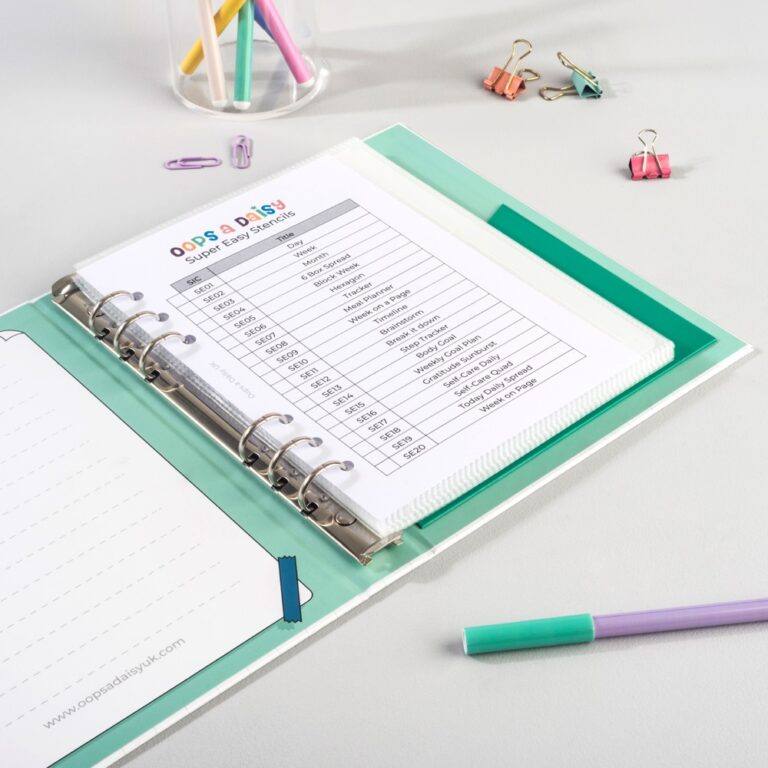
The Oops a Daisy Storage binder has room for approximately 20 stencils and co-ordinating Cheat Sheets. Therefore, each index sheet should list a maximum of 20 stencils so can be stored at the start of the index.
We have pre-printed checklists available for each stencil type, as well as blank versions, in both printed and digital formats.
Once you’ve listed all your stencils in your index, it’s time to label each stencil so you can easily cross reference them.
Labelling your stencils makes them easier to find, and helps to keep them organised long term.
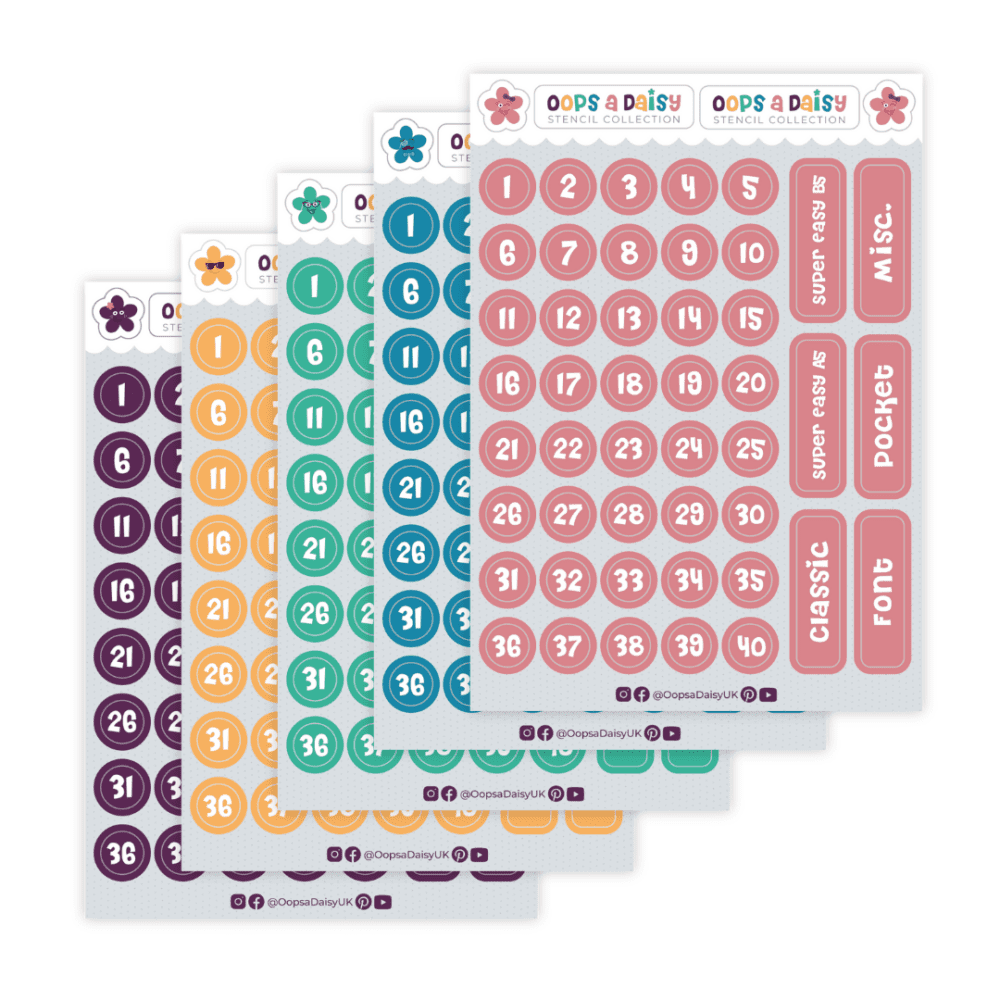
We have created a range of Stencil Organisation Stickers, available in 5 colours, which allow you to number the stencils in your index and apply the corresponding number sticker to your stencil.
Alternatively you could use a labelling machine or permanent marker to add the Stencil Identification Code to each stencil.
STEP 3 RECAP: You should now have batches of stencils, labelled and indexed, ready to be placed inside your storage system.
Boring marketing emails are the worst. Luckily, we don’t send those. Just cheeky little freebies, sneak peeks at all the newness, and a whole lotta fun.
(That’s worth an email address, right?)